Case Study
Pokémon Checker Web Application
How I developed a small, responsive web application, that fetches data from an external PokéAPI, dynamically generates HTML to display Pokémon names as a list and Pokémon details as a modal.
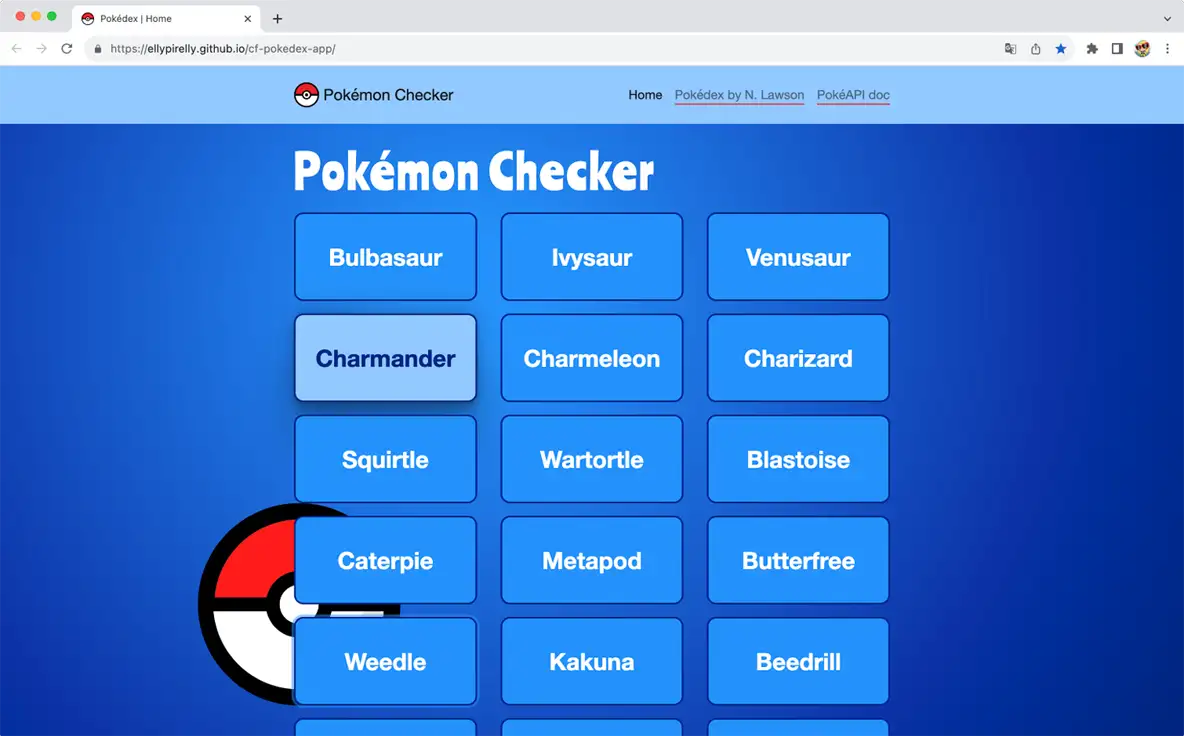
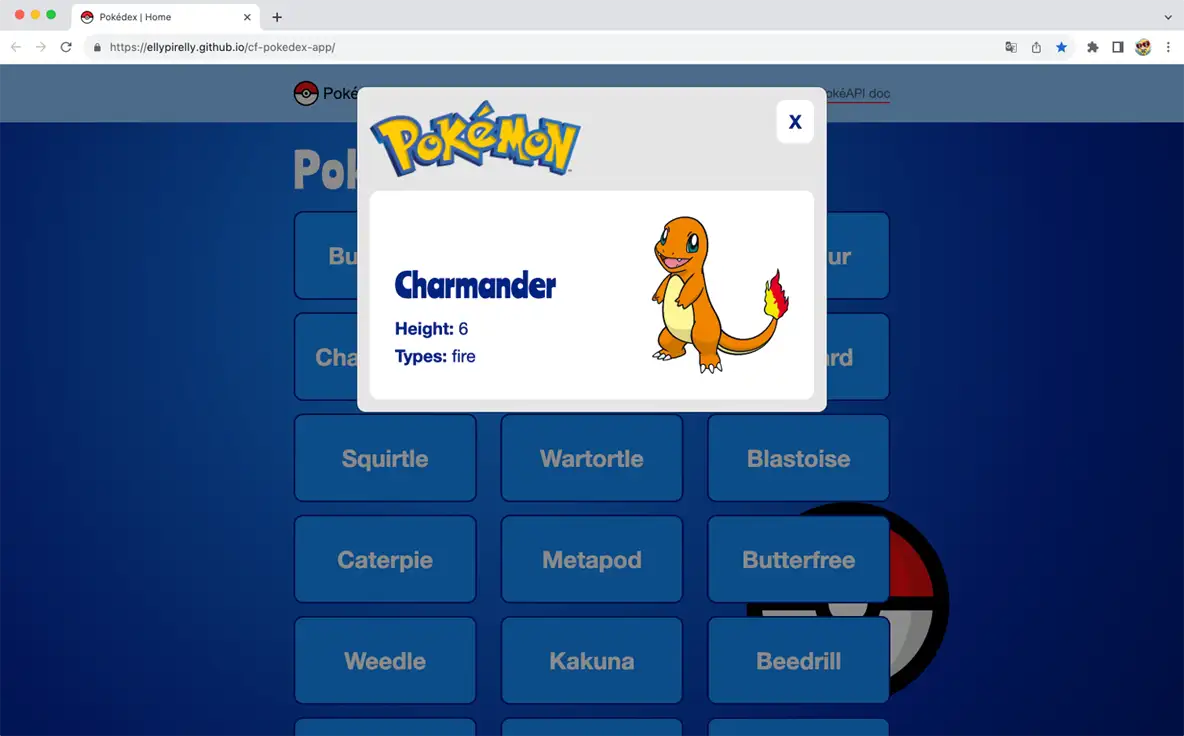
Overview
The Pokémon Checker consists of:
- a list of Pokémon names
- a modal showing Pokémon details
A user can browse through Pokémon names, shown as a list of clickable buttons. Once a user clicks on a Pokémon name a modal opens, showing detailed information about the selected Pokémon. A user can close the modal by outside click, click on the close button (x) or pressing ESC.
The Pokémon Checker fetches data from the PokéAPI.
Context

The Pokémon Checker is one of the projects I built during my Full-Stack Web Development Program at CareerFoundry to pass Achievement 1.
Achievement 1 consisted of 11 exercises, where working from task to task led to the completion of the Pokémon Checker web application.
Purpose & Objective
The goal of the Pokémon Checker was to build a small, responsive JavaScript web application by using HTML, CSS, JavaScript, Bootstrap (components, CSS, JavaScript) and jQuery, showing an understanding of how to fetch data from an external API, how to enable the viewing of data points in detail, how to dynamically generate and display content through DOM manipulation.
Styling was important but not the focus, as no Designers were involved. Ideally the result should be aesthetically pleasing and easy to use.
Duration
The given timeline was roughly 5 and a half weeks in total.
It took me 2 weeks to finish the Pokémon Checker and to pass the 11 exercises, I finished 3 weeks early.
Credits
A thank you goes out to my tutor Blaise Bakundukize who helped me when I got stuck in grasping certain concepts.
Approach - List
For the list view I use HTML, CSS and JavaScript to create and style a home page displaying Pokémon names as a list of buttons.
The Pokémon names are fetched from an external PokéAPI. The amount of displayed buttons depends on the amount of requested Pokémons.
I use the required Bootstrap Navbar component, Bootstrap CSS and Bootstrap JavaScript for the header navigation. Additionally, I use required polyfills for promises and for fetch.
Mock-up
Upfront provided was a simple mobile view mock-up for the list, primarily for reference purposes as the goal first and foremost was to have a functional app.
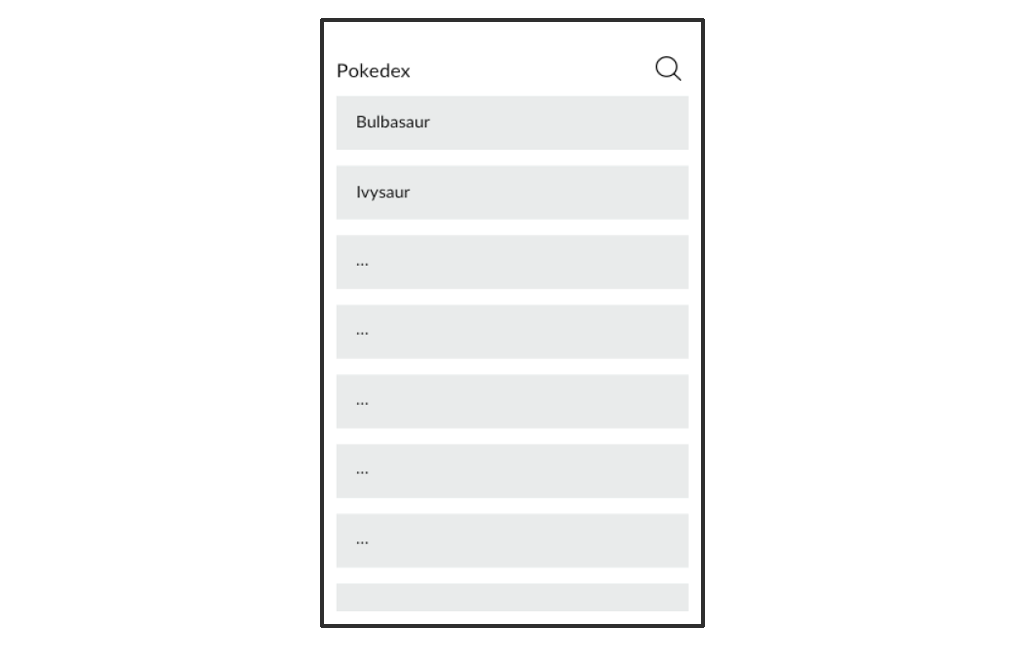
Contrary to the mock-up and as it was optional I decided to not implement a search as requirements for a search were unclear, time in total for CareerFoundry's Full-Stack Web Development Program was scarce.
HTML & Bootstrap
The Pokémon Checker started with regular, static HTML and static data.
As DOM manipulation was part of Achievement 1, for the list this then was refactored to only an ul element being static. lis and buttons, including class names, attributes, content, are created/generated with JavaScript.
The Bootstrap Navbar component came in as per requirement when the Pokémon Checker was next to ready, bringing its own HTML, CSS and functionality, were HTML and CSS was adapted by me regarding styling.
JavaScript
Required polyfills for promises and for fetch are integrated to mimic newer JavaScript features for older browsers.
Please see Challenges & Solutions.
API
General fetch of Pokémon names is limited to 30 objects to for performance reasons not request all (at time of writing) 1281 present Pokémons.
This general fetch returns objects containing Pokémon names and Pokémon details URLs.
I use the Pokémon details URL to address and display details (image, name, height, types) within the modal, see for example the data for the Pokémon Bulbasaur.
Approach - Modal
For the modal view I use HTML, CSS and JavaScript to create and style a modal displaying Pokémon details (image, name, height, types).
As the general fetch from the external PokéAPI returns objects containing Pokémon names and Pokémon details URLs, I use the Pokémon details URL to address and display details (image, name, height, types) within the modal, see for example the data for the Pokémon Bulbasaur.
I use the required Bootstrap Modal Component, Bootstrap CSS and Bootstrap JavaScript for the modal. Additionally, I use required jQuery for the showModal function to show how it simplifies complicated JavaScript concepts such as Ajax, DOM traversal and event handling.
Mock-up
Upfront provided was a simple mobile view mock-up for the modal, primarily for reference purposes as the goal first and foremost was to have a functional app.
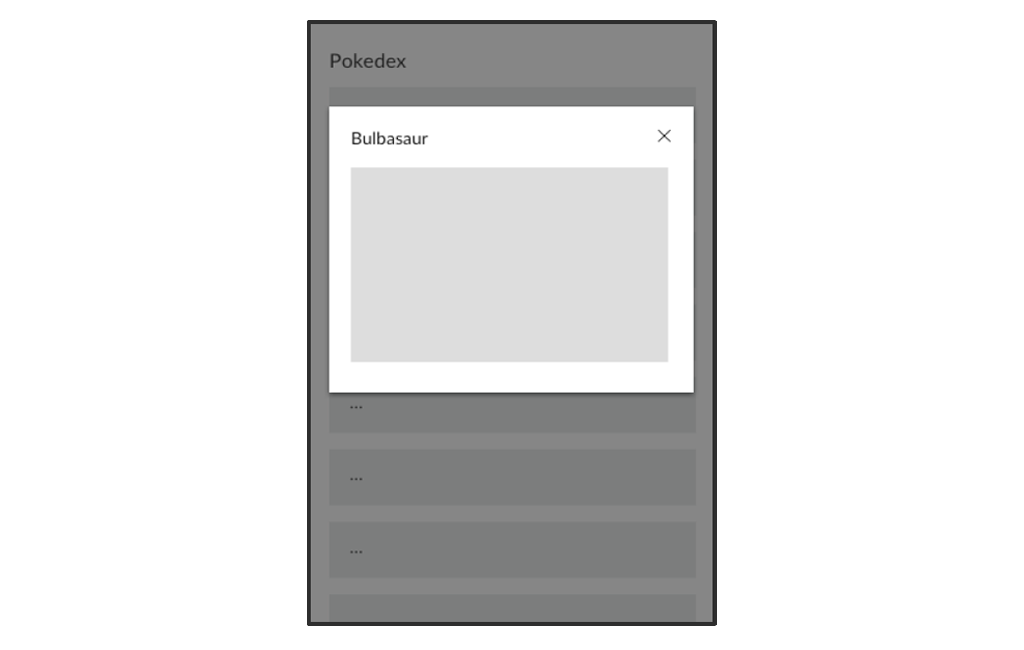
Contrary to the mock-up and as it was optional I decided to not implement a search as requirements for a search were unclear, time in total for CareerFoundry's Full-Stack Web Development Program was scarce.
HTML & Bootstrap
The Pokémon Checker started with regular, static HTML and static data.
As DOM manipulation was part of Achievement 1, the modal set-up first contained an outer div modal-container, where all elements, including class names, attributes, content, were created/generated with JavaScript.
When the required Bootstrap Modal component came in, and with it its own HTML, CSS and functionality, all of this needed to be refactored.
Now, only the default outer div of the Bootstrap modal-header and Bootstrap modal-body are static, everything in it is created/generated with JavaScript.
The default Bootstrap modal-footer was not needed and was deleted by me.
jQuery
jQuery is implemented explicitly in the showModal function to show how it simplifies complicated JavaScript concepts such as Ajax, DOM traversal and event handling.
It is not used anywhere else as its goal is to understand how to work with potential legacy code that has jQuery in it.
To practice working with jQuery, an additional exercise in Achievement 1 was to change a provided, working solution in vanilla JavaScript to use jQuery - a ToDo list on replit. I decided to not do this in replit but as a mini project on GitHub. Find the simple ToDo list here.
API
As general fetch of Pokémon names returns Pokémon names and Pokémon details URLs, I use the details URL, for example for the Pokémon Bulbasaur, to address and display details within the modal.
As the default image generally is of bad quality, I reference a better quality image in the code which also has the bonus of being an svg file.
Retrospective
What went well
The pace with which I worked myself through Achievement 1 was great.
Wrapping my head around how to request data from different external API URLs, addressing specific data points, successfully diving into the single Pokémon object data, finding a better quality image as the one recommended, was fun!
It was impressive how easy it is to implement Bootstrap components to get something on the page, including functionality and styling, yet a bit frustrating to need extra time to understand what to change to get a desired result which does not resemble the default.
The silly background animation was fun to quickly incorporate. Designing (even if simple), styling, researching logos, researching fonts, generally being responsible for everything on my own, was really cool.
Challenges & Solutions
Static HTML vs HTML created with JavaScript
I wish I would have realized right from the beginning, that refactoring was a given and planned for Achievement 1, and nothing to stress about. When bringing in modules late in the process, refactoring code to have it working again is natural. Not fully understanding this right away, I found the process of repeatedly re-writing/creating/generating a lot of HTML elements, class names, attributes, content, slightly confusing and complicated.
An example: When I started the modal, per requirement I needed to create/generate a lot of HTML elements (class names, attributes, content) with JavaScript. When later the Bootstrap Modal component came in, it wasn't clear what was expected (and made sense!) to still have static and what to generate dynamically. So during implementation, HTML and CSS (and JavaScript) turned out to be a non-functional, badly named hot mess, and I needed some time to figure out the cleanest working set-up. All of this led to refactoring HTML, JavaScript and CSS not only once.
Solution: Achievement 1 consisted of 11 exercises, where working from task to task led to the completion of the Pokémon Checker web application, so feeling challenged was part of the learning curve to understand DOM manipulation and to handle refactoring. Yes, refactoring was time consuming, at the same time the code benefit from it as it became cleaner and easier to understand.
There's the additional takeaway of being wary of to what extend one should create/generate content with JavaScript. The next time I encounter something like this, I would thoroughly check feature requests, make up my mind really early in the process about how my HTML needs to be structured, what kind of functionality needs to be included.
Polyfills
Using polyfills for promises and fetch to support IE was a challenge, as it was a bit of a messy explanation and process why to download and use two very specific files.
Solution: If you need to support older browsers (IE), you need to put in the work. If this would be the case in the future especially regarding IE, I would always discuss approaches/performance (!) with my team, PM/PO, stakeholders, to find the best working solution.
Bootstrap components & Bootstrap CSS
General CSS styling was needed before any of the Bootstrap components came in, so as soon as they came in, I needed to take back all of my previously set styles to figure out what Bootstrap brings out of the box, how to configure that, how to bring back previous styles that still were missing.
The possibility to spend time on going through the Bootstrap documentation to find out how to configure modules to achieve a certain style/behavior was really limited.
Solution: Going through the 11 exercises, working from task to task, it again was part of the learning curve to understand how to incorporate Bootstrap modals into an already existing legacy code. As refactoring was needed not only once, I took this as an opportunity to properly rename functions, class names having BEM in mind, and to check if the HTML structure in general makes sense.
In the future I would implement desired default modules first to find out what comes out of the box and would definitely take the time to go through documentation. Only then I would either adapt configuration/theming or add own CSS styling - or both.
jQuery
Let's just say that I am not a fan and implementing it felt challenging ;)
Per requirement, jQuery only explicitly needed to be used in the showModal function. In my opinion using it only there makes the scripts.js messy. I still deliberately decided to not refactor the rest of vanilla JavaScript to jQuery.
Solution: Not using jQuery? Just kidding, I know that one can encounter it in legacy code. Personally, I would rather not use it even though it makes coding life subjectively easier through writing lesser code. After all, it's another JavaScript library that is thrown at a project (performance!), with functionality that could probably be achieved with vanilla JavaScript. With the use of jQuery there's too much happening behind the curtains I would rather know, understand and being able to debug.
Formatting and linting with Prettier and ESLint
This was a tough one, as I couldn't get the required combination of Prettier and ESLint to properly run and format. Formatting with Prettier was no problem. ESLint did not work. Configuration of both stopped the formatting of JavaScript files.
As I had some other formatter extensions in Visual Studio Code before, I sensed that there might be an interference between all of them, especially maybe with SCSS Formatter. I also found out that I do not need Prettier at all, as Visual Studio Code brings code formatting for HTML, CSS/SCSS and JavaScript out of the box.
It took me a bit to figure out how to best structure my bug fixing approach and to make peace with the fact that the time it would take to fix this needed to be invested.
A first step was to understand that this bug fixing was actually two parts: one part being my personal preference how to code and format (still following common rules!), the other part being how to work in a work environment/team that has certain formatting and linting rules configured.
Solution: As properly formatting is crucial and as I generally did not trust my (user) settings in Visual Studio Code any longer, I decided to do a harsh reset.
In Visual Studio Code, I:
- deleted all of the content in my user
settings.json, except for a last pair of{ } - uninstalled all of my Visual Studio Extensions
- carefully brought back the customized workspace/editor/terminal/formatting settings in my user
settings.json - carefully re-installed the Visual Studio Code extensions I need, having a closer look at what they actually DO, this included the ESLint Visual Studio Code extension
In the Pokémon Checker web application, I:
- deleted/uninstalled Prettier, ESLint and configs off of the project
- ran
npm install eslintagain, to have it in the workspace folder and NOT globally - re-introduced an
.eslintrcwith a basic config - researched and introduced an
.editorconfigwith a most global configuration to achieve a common code formatting for hypothetical collaborations
Even if being the last exercise of Achievement 1 and - looking at it - a rather small one, this was a huge wake-up call regarding the importance of formatting and linting, especially when it comes to working on a project in a team. I am more than ever aware of having this clarified and set up before writing one line of code in a shared project.
Final Thoughts & Outlook
As Achievement 1 was the first Achievement of CareerFoundry's Full-Stack Web Development Program, I felt quite a sense of accomplishment completing it 3 weeks early while having a lot of fun!
Even the challenging and tough parts were fun, as I learned a lot, for example, being patient (example: repeated refactoring), taking a step back if necessary (example: Visual Studio Code set up, formatting and linting) and re-thinking approaches (example: what to do when when bringing in libraries into legacy code)!
Being aware of the fact that the Pokémon Checker could use some refactoring, I decided that I won't do this. I will spend my time in building new projects that are based on what I learned.
Links
Pokémon Checker on GitHub pages Pokémon Checker code on GitHubPublished: July 2023